Four years ago, I had just bought a house and thought “I really need some pillows in this living room.” I struggled with this because I had a brown couch, pale gold chairs, blue walls, and teal curtains. I promise none of this is as ugly as it sounds, but it made looking for coordinating pillows nearly impossible. Not to be defeated, I started looking for fabric instead. Surely I could manage to make a few pillow covers? That’s barely even any seams! I eventually found this great fabric at Joann’s – for SEVENTY DOLLARS A YARD. I did a bunch of research and was trying to decide what size I should make and eventually landed on a decision to order 3 yards. Who wants to spend $210 on fabric? Not I, so I waited until there was a 60% off coupon. Now I’ve ordered the fabric, I can’t wait to get this project going! Right before it arrives I tear apart my bathroom floor for a “quick 4th of July remodeling project”. HA. The pillows were quickly forgotten amid mold remediation. Every once in awhile I’d see the roll of fabric in the corner of the room and feel guilty for having spent so much and not done anything with it yet. But I couldn’t decide what I wanted to do! Did I want to make 18 inch pillows? 20 inch? Should I do envelope style? Should I try for zippers? What should I do for trim? Overwhelmed, I just put it off.
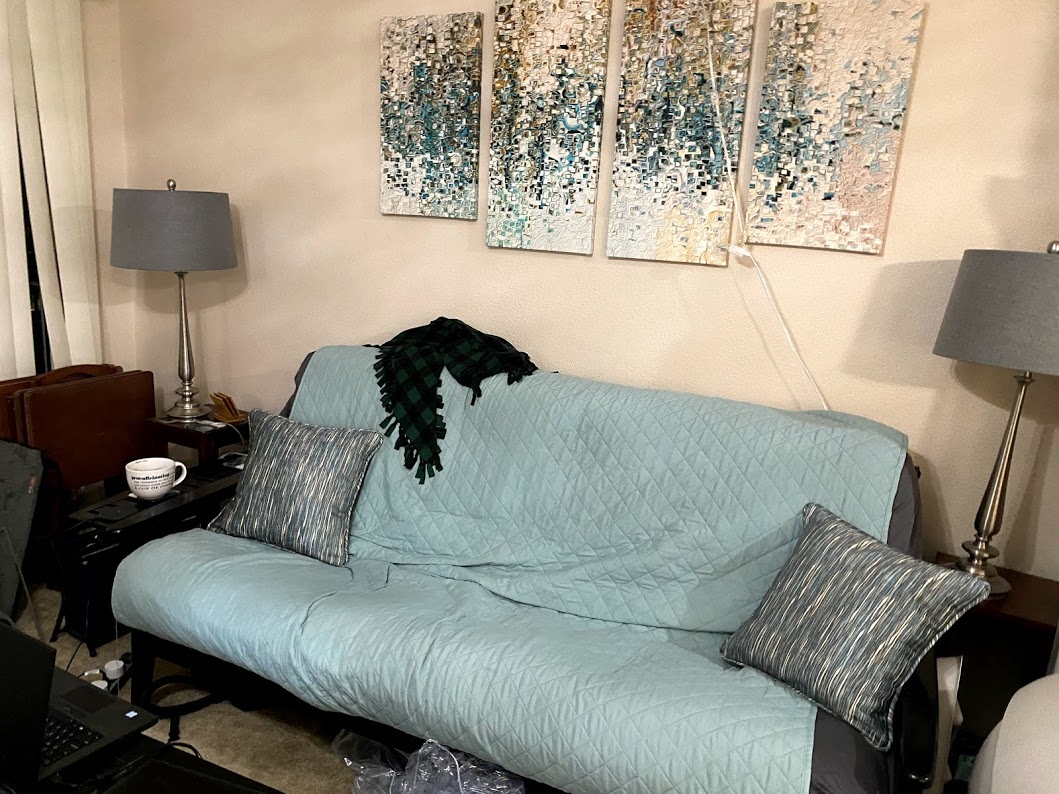
Fast forward a couple of years, I tossed out those couches to the curb while I was moving. The fabric moved with me and made it out to my living room when it came time to start decorating. I was still committed to these pillows happening. Someday. The art I ordered for over my couch was amazing, but most importantly it coordinated with the pillow fabric. At this stage all I had left that originally coordinated with the pillow were the gold chairs. My enthusiasm for decorating my living room was renewed when I got the wall hanging up and end tables for my lamps. Surely this was the time I’d finish the pillows! I wasn’t even in school anymore! I picked out the pillow forms and ordered them. 20 inches to go inside 18 inch pillowcases. Some blog told me it was a good idea, to really stuff the pillows so they don’t get the dumb corners. They weren’t wrong. It might even be the same one that made me decide I needed 5/32 inch piping for my bias tape trim that I’d begrudgingly decided to fuss around with. I ordered this for pickup at Joann’s because I “couldn’t wait” for the cheaper stuff from the internet and I couldn’t find it in the store. Turns out the employees couldn’t find it either so my order was cancelled. This was January 2019. I definitely could have waited, as it turns out. Defeated, I made plans to try for another store in the area. I promptly forgot all about all of this and only thought of it when I saw the stack of pillow forms next to the tv on the cat tree. Eventually those were moved to my office closet, never to remind me again.
It only took me two weeks of being stuck at home to notice those pillows in the closet as I was organizing my office and finally getting my sewing area together.
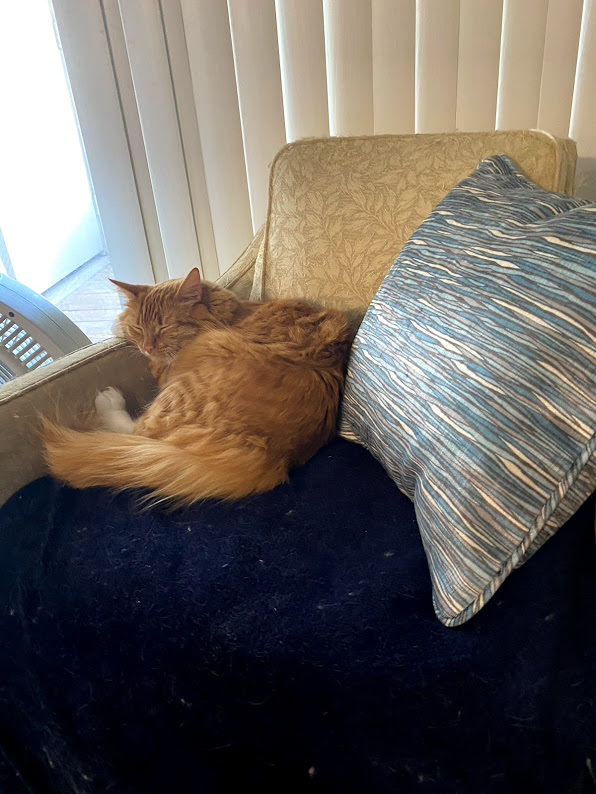
Now on to the next project: finally getting around to having these gold chairs reupholstered. Sorry Grandma, it’s not that I think they’re hideous, it’s that Chester thinks they’re a great scratching post. I thought they were ugly long before now, but they’re so comfortable I’ve never cared. 🙂
Fake it til you make it
Ok, but Sarah, how did you even make the pillows? I don’t really even know where all of these instructions came from but here’s what I made up along the way that actually worked out:
I used my grid and swedish tracing paper to mark and cut out an 18 by 18 inch square with lines marking 13 inches, then used that to cut out an 18 by 18 inch square for the front and two 18 by 13 inch squares for the back. When I was done cutting those out, I cut 1 3/4 inch wide strips on the bias, or a 45 degree angle, to use for piping.
For each pillow, because who even knows if I cut everything nicely square, I laid them out first to make sure the edges matched up and swapped pieces around until they did. Remember if you’re doing this – right sides together or wrong sides together and pay attention to directions on the fabric. Once I’d decided what went where, I hemmed the inside seam allowance for the back pieces. This is the part where it becomes the “envelope” pillow style and it crosses over. I folded over 1 inch and did a straight stitch at a 3/4 inch seam allowance.
* If I were doing this with a more washable fabric, I would say to zigzag or serge that edge before doing that. I probably still should have, but I hate the default zigzag settings on my sewing machine and I have yet to successfully RTFM to find the width setting to fix it.
After that was done, I lined them up with the front piece again so that they overlapped and made a square, then stitched them together along the overlap on both edges with approximately a 1/4 inch seam allowance.
The next step was a fun trick I learned from a blog (or several). You can create piping WHILE attaching it. Sturdier fabrics are super forgiving in this regard because it’ll stand out around the piping. It’s awesome and there’s a decent margin for error without it really showing. For this, I don’t know where they were finding piping foots that would even be useful for this. You’re going to want a zipper foot, preferably one with a dedicated shank.
* Easy change zipper foots are the literal worst, I want my mom’s old singer back. You CANNOT sew close to anything because the back of the foot is in the way the whole time.
I started in the middle of what I intended to be the “bottom” of the pillow front. With the right side facing me, I started attaching the piping. I left about 2 inches of cord sticking out before where I started the bias tape, wrapped the bias tape around the welt cord, aligned it with the edge of the fabric square, and used wonder clips to hold it in place. I was worried it would slip if I didn’t have clips holding it and I needed to leave room for finishing the ends of the bias tape, so I left 2-3 inches where it was just clipped to the fabric before I started sewing it down. I used about a 1/2 inch seam allowance to stitch the piping to the pillow front. As I got more comfortable, I would clip a starting point with the piping clipped to the pillow and then clip only the piping together and align it with the pillow as I sewed. I stopped about a half inch before reaching the corner, backstitched, and ended the thread. I then used a smaller seam allowance to stay stitch the piping together for the next couple of inches so it would hold together as I rounded the corner with it. I then clipped the seam allowance of the piping at the corner, 1/2 inch in, and 1 inch in along the edge I’d just stitched. I think I cut in about 3/4 of the way through the seam allowance and this allowed me to get it to mostly form a corner. Most of the time it was more like a diamond in the corner than a square but I liked the slightly rounded corners it allowed me to make. I used clips to force it to hold this placement of the piping around the corner too, stitching the straight part of the seam before going back later to round off the corners and finish the rest of the side.
Upon reaching the end, I was left with a choice: follow the usual method of ending piping by folding over the fabric…or…magically getting the seam allowance just so and stitching it together. Challenge accepted! The nice thing is it’s bias tape, so if it’s a little small it will stretch. If you get it a tiny bit big, well, you’ve probably just given it a little more room for where your cord ends meet or overlap. I had very forgiving fabric so I just let them overlap about a centimeter or so. If I didn’t I might’ve used glue on the ends to make sure it stayed together and met perfectly. Once this is done, you have a fully assembled front piece with piping!
Next (and last!) is to attach front to back. Right sides together, I started by clipping the top and bottom together (the sides that do not have the extra bulk and weirdness of the overlapping back pieces). The corners of the front get scrunched in a bit, so I just made sure the sides would align nicely and kind of accounted for that. To sew it together, I flipped it so I could see the existing stitching on the front and try to sew inside it and perhaps a little straighter with the piping. 🙂 I used the same alignment with the edge of the foot as before for my 1/2 inch seam allowance, but I bumped my needle as far left as it would go to get closer to the piping since I couldn’t shift the piping any closer because of the back of the foot getting in the way. When done, I turned it right side out and checked the corners. If any seemed like the piping was looser than I wanted, I’d go back and stitch along that corner a bit closer. Then that was it!
Was it worth it?
Honestly, they ended up being $35 apiece in materials because of the expensive fabric and probably 2 hours of work because I like to take my time. It definitely was not a money-saving endeavor but I do love the pillows now that they’re done. My cats, however, are not thrilled with the intruders on their favorite sleeping areas. I’m hoping that this fabric stands up to their abuse well!


